
DLG GROUP · INSIGHTS / RENOVATION
A bathroom that works beyond the finish
Explore the wall-to-floor layer study →
Separate the finish, waterproofing and service access before comparing prices. Follow the layer details and quantity examples, then record which checks happen before concealed work is covered.
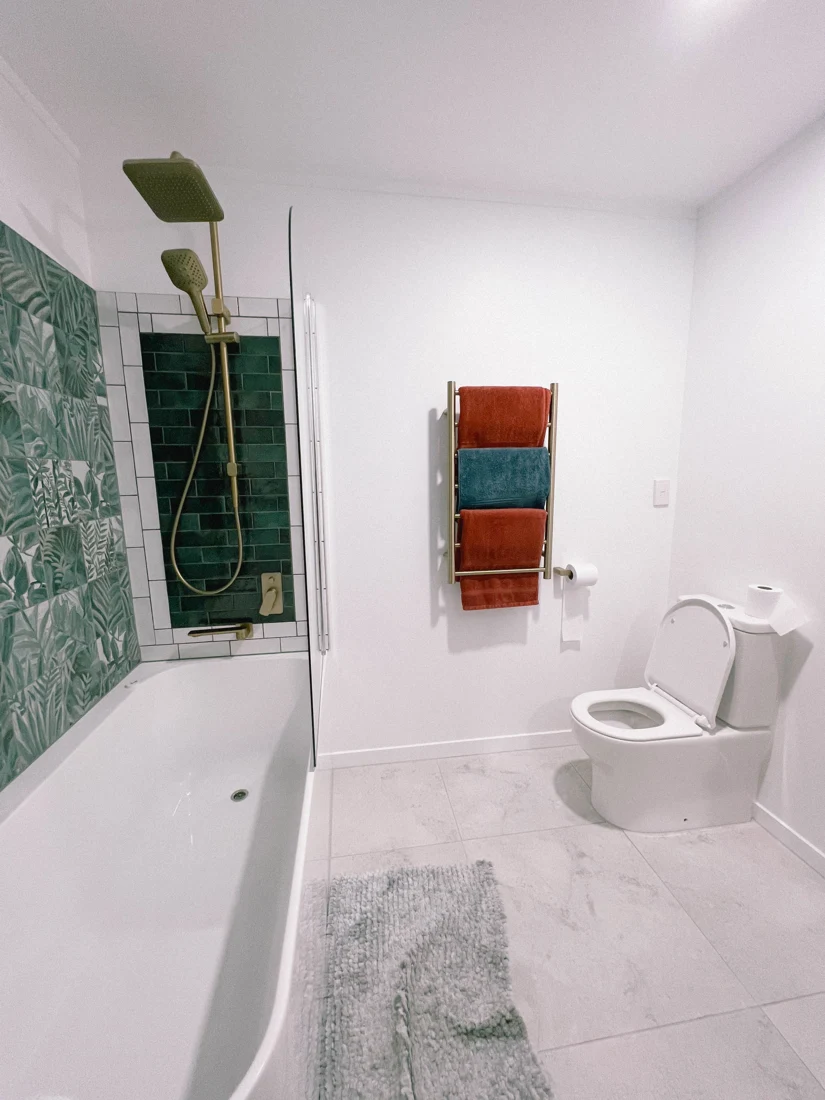
ACTUAL PHOTOGRAPH / REFERENCE
The finish is only the visible part
- Tiled wet wall: The finish is visible. The backing and water-control layer behind it are not.
- Screen edge: Check where the screen meets the tub and whether its fixings or seals need service.
- Tub-to-wall joint: The visible joint is a useful inspection point. It does not reveal how the concealed waterproofing connects to the tub.
See which photos and records to ask for.
Planning a remodel? Decide what to keep, repair or reuse.
This 2023 bathroom reference from Wellington, New Zealand, shows the tub/shower screen, tiled wall and adjacent fittings. It is an international layout reference; concealed waterproofing, drainage, ventilation and U.S. requirements cannot be established from the photograph.
Ask: Where are the selected water-control layer, tub-to-wall detail, screen fixing and service access recorded?
Photo source & use
Smtzzz / source: Southern Plumbing · 2023-01-23. Wikimedia Commons source record · CC BY-SA 4.0. EXIF orientation, resized and WebP encoded; no retouching or crop. Checked 27 October 2026. Not a DLG project, endorsement or installation approval. Photo adaptations retain the stated source licence.

Optional architectural concept illustrations
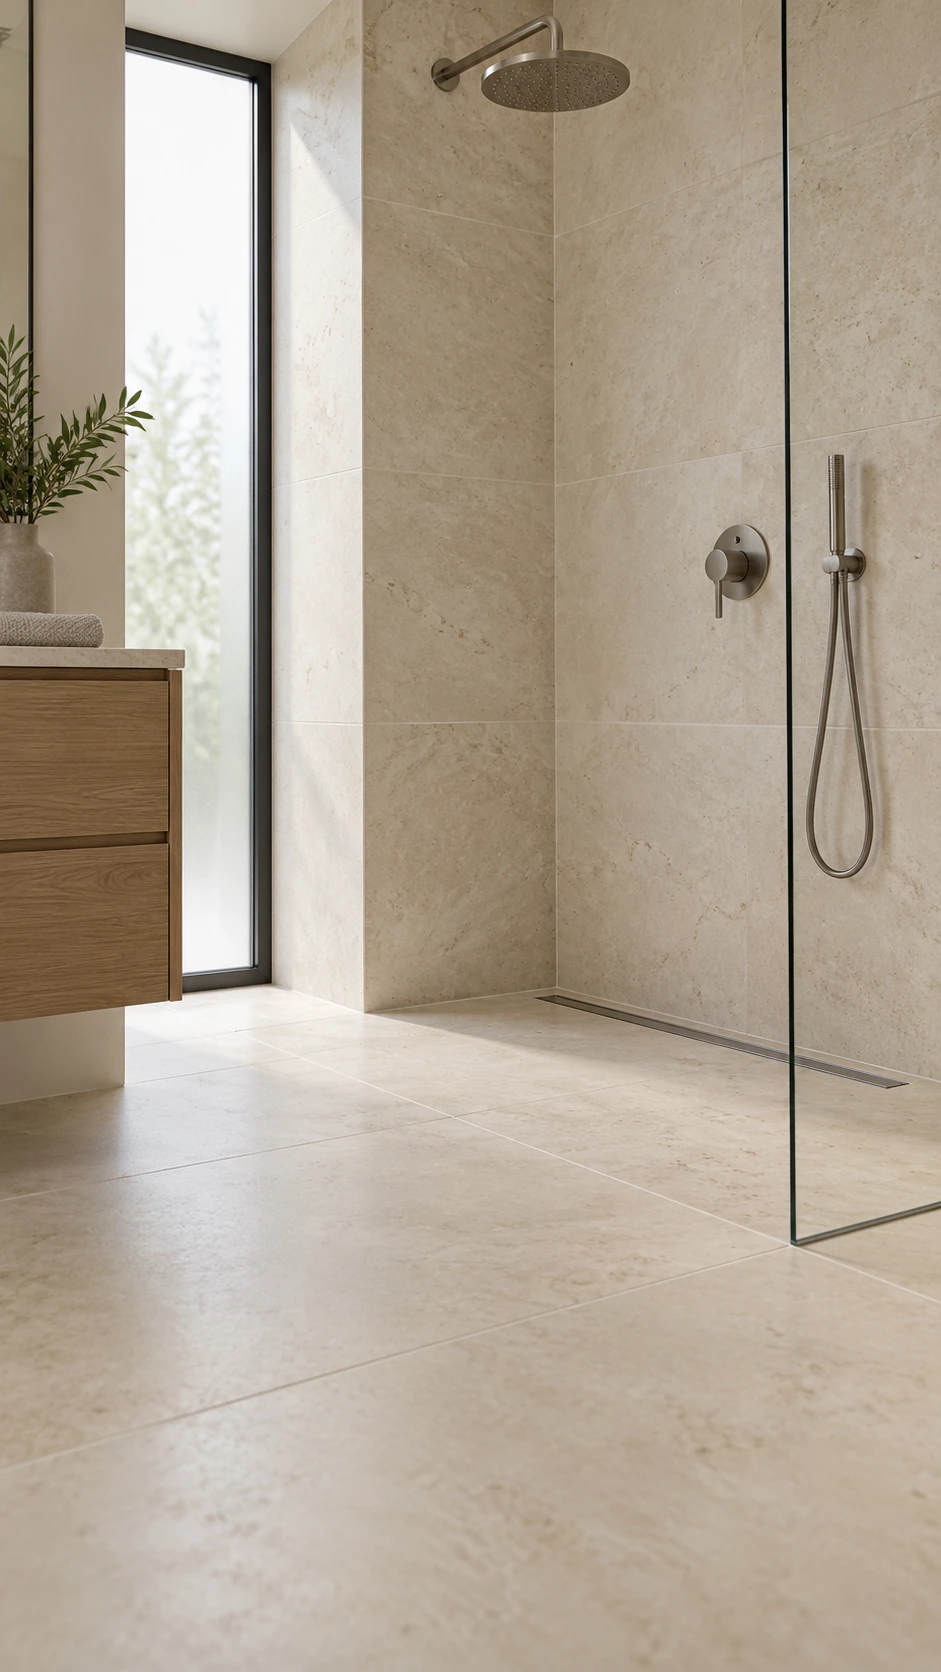
Watch the bathroom concept overview · 18 seconds
Watch the short visual overview
What sits behind the tile?
An 18-second visual summary of this guide. The article carries the detail; the film introduces the questions.
Silent transcript: What sits behind the tile? Tile and grout alone are not waterproof. Ask which waterproofing system is proposed. Look at the drain connection. Ask how waterproofing connects to the drain. Request the system details. Review corners and penetrations before the work is covered.
AI-generated concept stills. Finished-surface imagery illustrates the discussion; it does not show a verified concealed assembly.
ORIGINAL DLG DRAWING / INTERACTIVE LAYER STUDY
Read the junction,
layer by layer.
A finish can hide several different responsibilities. Select a layer to highlight its role, then carry the questions into the project discussion.
01 / FINISH
Start with what you can see.
Tile and grout provide the visible finish; they do not, by themselves, establish a waterproof shower. Schluter’s U.S. guidance distinguishes the finish from the waterproofing beneath it.
Questions for the proposal
- Which exact finish and setting material are specified for this location?
- What evidence will be available for the work concealed by the finish?
Keep in the record
Finish schedule and exact product documentation.
02 / WATER CONTROL
Follow the layer through the turn.
This example places water control near the surface, behind the finish. It illustrates continuity as a review question; it does not specify a corner treatment or approve an assembly.
Questions for the proposal
- Which selected-system detail carries water control through this junction?
- How are corners, penetrations and the drain interface documented before covering?
Keep in the record
Applicable system details, progress photographs and the required test record.
03 / SUPPORTING SURFACES
Ask what the next layer depends on.
The supporting surfaces are a separate part of the proposal. The drawing does not select a board, substrate, fixing, floor slope or structural arrangement.
Questions for the proposal
- Which exact supporting products and preparation are included?
- Who confirms readiness for the selected waterproofing system?
Keep in the record
Named substrate products, preparation scope and installer review records.
Source context: Schluter U.S. — waterproof showers, checked November 1, 2026. Drawing and review questions: DLG editorial synthesis. Not an installation specification.
01 / The room & water-control layersFinish, waterproofing, worked quantities and a real construction reference.
An attractive bathroom is easy to photograph. A well-planned bathroom also needs a clear approach to water, materials, drainage, maintenance and the work you will not see after completion.
This guide brings together manufacturer guidance and public moisture-control resources. Use it to compare proposals and ask better questions before a renovation. Examples refer to ordinary residential bathrooms; steam rooms and specialist installations need a separate specification.
Start with three separate decisions
How should the room work? Write down who will use it, what storage is needed, what must remain accessible and which layout problems you want to solve.
How will water be managed? Ask for the proposed waterproofing assembly, drainage approach and treatment of connections before the finish schedule is approved.
What will you live with? Compare the exact finish, cleaning instructions and replacement options, rather than choosing only from a sample board.
These are DLG planning questions. They are not a ranking of brands or a promise that a particular material will prevent every defect.
1. Understand the layers behind the tile
Schluter identifies waterproofing beneath the tile as central to a tiled shower: tile and grout alone do not form the waterproofing system. [S01] Ask where the water-control layer is located and how it remains continuous through the proposed assembly.
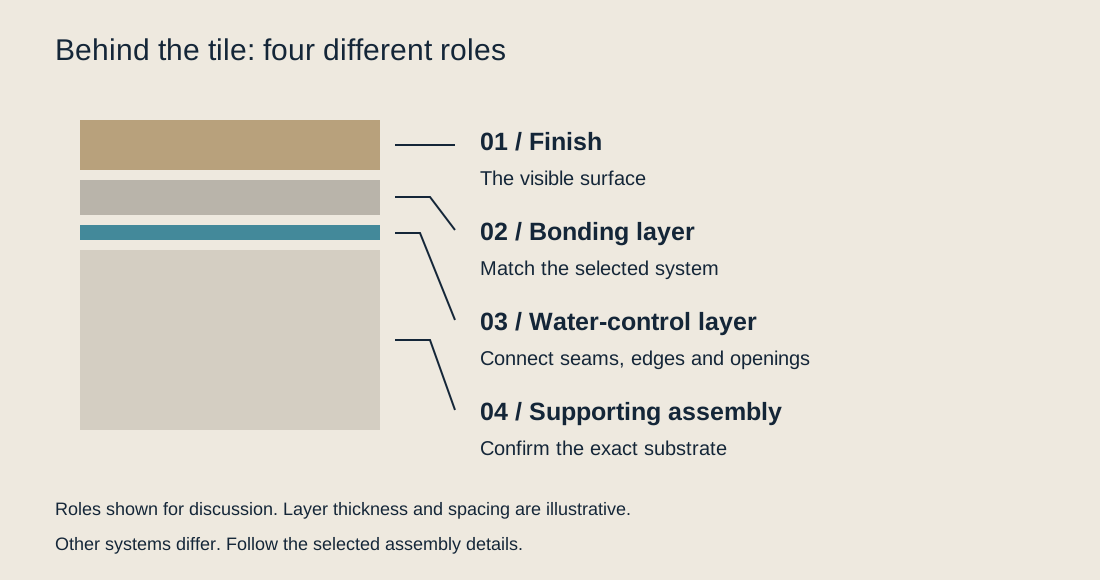
Do not use the word “board” as a complete specification. James Hardie describes its standard Backer range in terms of water resistance, while its Backer PRO page describes an integrated waterproof board solution installed with specified seam tape and mortar. [S02, S03] This is a useful example of why the exact product name and joint treatment matter. The manufacturer’s statement about a board does not, by itself, establish that every drain, fixing and penetration in a room has been resolved.
Detail to notice: A water-control layer needs an explanation at its edges and connections, not only in the middle of a wall.
2. Compare waterproofing approaches
| Approach | What the source describes | What to ask before accepting the proposal |
|---|---|---|
| Bonded sheet membrane | LATICRETE describes HYDRO BAN Sheet Membrane as a sheet bonded using a substrate-appropriate thin-set. [S04] | Which membrane, bonding material and seam details are specified? How are corners and the drain connection treated? |
| Liquid-applied membrane | LATICRETE describes HYDRO BAN as a liquid polymer that forms a continuous waterproof membrane. [S05] | How will application coverage, required thickness, drying conditions and the manufacturer’s inspection requirements be checked? |
| Board with integrated waterproofing | Backer PRO is an example of a board whose stated waterproof installation includes designated joint treatment. [S03] | Which exact board and accessories are proposed? How are joints, fixings and transitions completed under its instructions? |
This comparison describes different ways to form a water-control layer. It does not establish one universal winner. Ask the installer to identify the complete proposed system and obtain written guidance for any mixed-product interfaces.
Drying and test timing are product dependent. A time advertised for one membrane under stated conditions is not a universal waiting period for every bathroom. Keep the current product instructions with the project record. [S04, S05, S06]
2A. Read a selected sheet-membrane detail
In the Schluter Shower System Handbook’s KERDI wall-membrane instructions, adjacent membrane edges overlap by 2 in (50 mm), or sheets abut with KERDI-BAND centered over the joint. The handbook identifies compatible mortar choices and separate penetration treatments. Its water-test guidance calls for waiting at least 24 hours after membrane installation before the test, with local plumbing requirements also checked. [S13]
Those two details answer different questions: overlap concerns the waterproofing connection; waiting concerns readiness to test. The 24 hours is not the test duration and does not guarantee a passed test. Nor should the KERDI overlap be used as a specification for an unrelated sheet or liquid system.
Selected detail: understanding the KERDI overlap
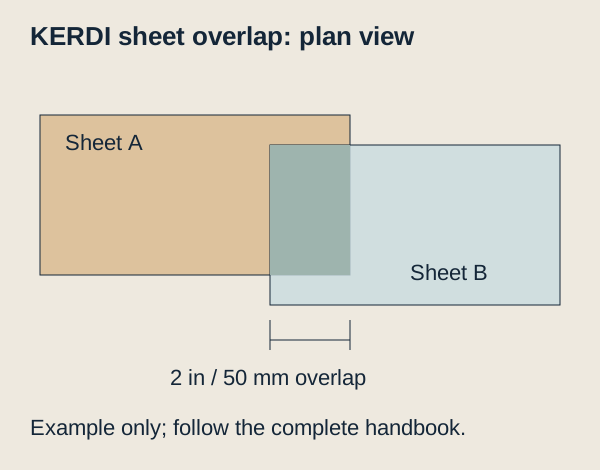
A useful proposal names the membrane, substrate, bonding product, seams/corners, penetration accessories and drain interface. Ask for photographs and the applicable test record before tile covers them. A contractor who describes only the tile and grout has not yet explained this assembly.
2B. Worked shower quantities: area is not a complete order
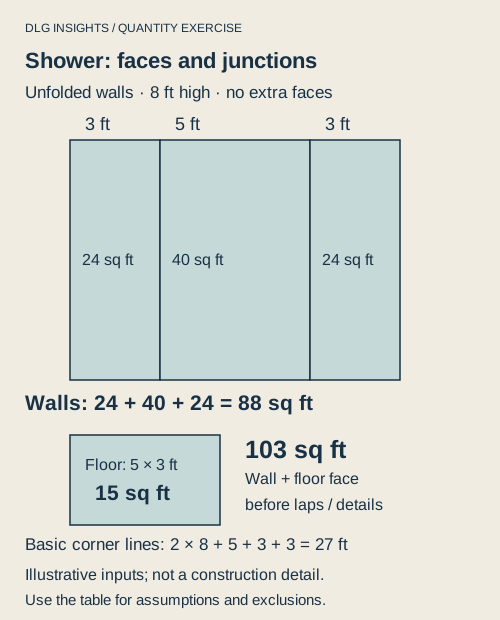
Assume a rectangular 5 × 3 ft shower, three tiled walls 8 ft high and an open 5 ft entrance. No niche, bench, ceiling, curb faces or doorway returns are included. This is an original quantity exercise; it does not prescribe a compliant shower size, slope or waterproofing extent.
| Item | Calculation | Example result |
|---|---|---|
| Back wall | 5 × 8 | 40 sq ft |
| Two side walls | 2 × 3 × 8 | 48 sq ft |
| Three wall faces | 40 + 48 | 88 sq ft |
| Floor face | 5 × 3 | 15 sq ft |
| Wall tile with assumed 10% allowance | 88 × 1.10 | 96.8 sq ft |
| Floor tile with assumed 10% allowance | 15 × 1.10 | 16.5 sq ft |
| Basic wall-plus-floor membrane face | 88 + 15 | 103 sq ft before detailing |
The last line is not a membrane purchase quantity. Sheet layout, laps, corners, openings and additional waterproofed surfaces must be added under the selected system. If planning separate corner banding, the basic two vertical corners plus three wall/floor junctions total 2 × 8 + 5 + 3 + 3 = 27 linear ft before overlaps, extra details and waste. Whether band is required at each location depends on the chosen system and assembly.
Keep wall and floor tile quantities separate: their intended-use classification, format and package coverage may differ. The 10% allowances are illustrative and not manufacturer rules; layout and format can require a different provision. Do not infer adhesive, liquid-membrane or grout consumption from tile face area alone.
2C. What a real work-stage photograph can tell you
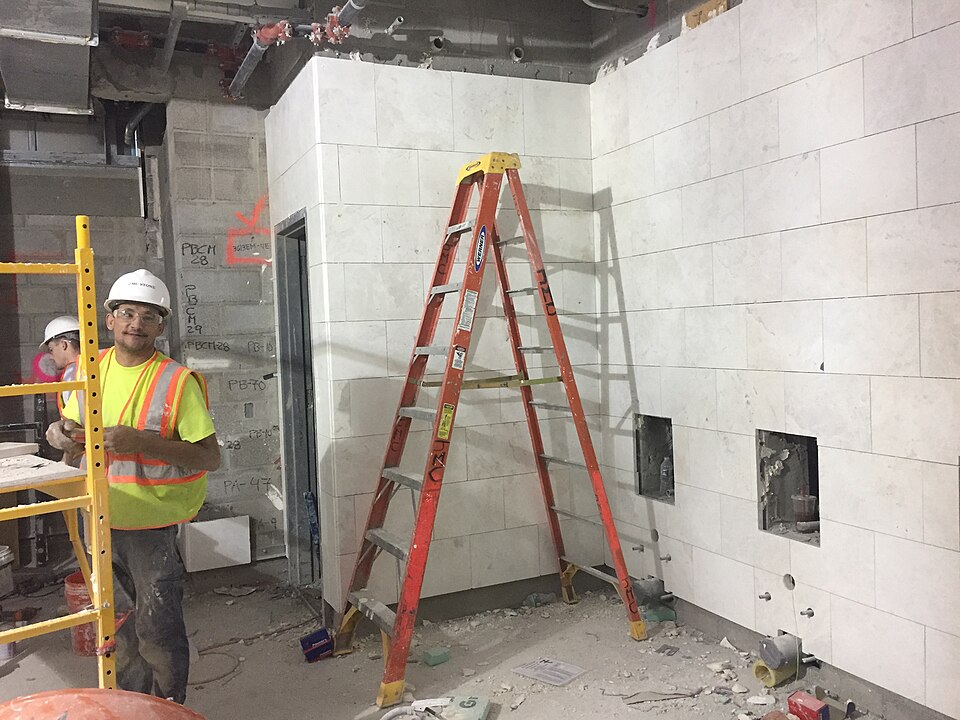
The openings and unfinished upper work show why later services and finishes need coordination. Use a comparable stage in your own project to check which openings remain and which trade is responsible for completing them. This image cannot prove concealed waterproofing or a passed test; it is a coordination reference, not a residential shower specification.
02 / Junctions, materials & ventilationCorners, penetrations, finish selection, sequence and ventilation.
3. Review the connections, not just the large surfaces
Buyer and renovation checklist
Ask what was documented before the tile went on
At a showing, look for visible issues and ask how the assembly was built. In a renovation, agree on the evidence to collect before the work is covered.
01 / Photos before tile
Ask for dated photos of the water-control layer, corners, pipe penetrations and the tub flange or shower drain connection, as applicable.
02 / Product and installation records
Ask which system and components were installed, then request the product details, installer information and any available invoice or warranty.
03 / Test or inspection record
Ask whether a shower pan test applied, when it took place, and whether the result was recorded. Ask for permit or inspection records where applicable.
04 / What remains unknown
Note loose finishes, staining or deteriorated joints for follow-up. If records are missing, mark concealed work as unverified and raise it with the home inspector or a qualified contractor.
See the concealed layer diagram · Continue to the home buyer guide · Building America Solution Center: shower wall assemblies
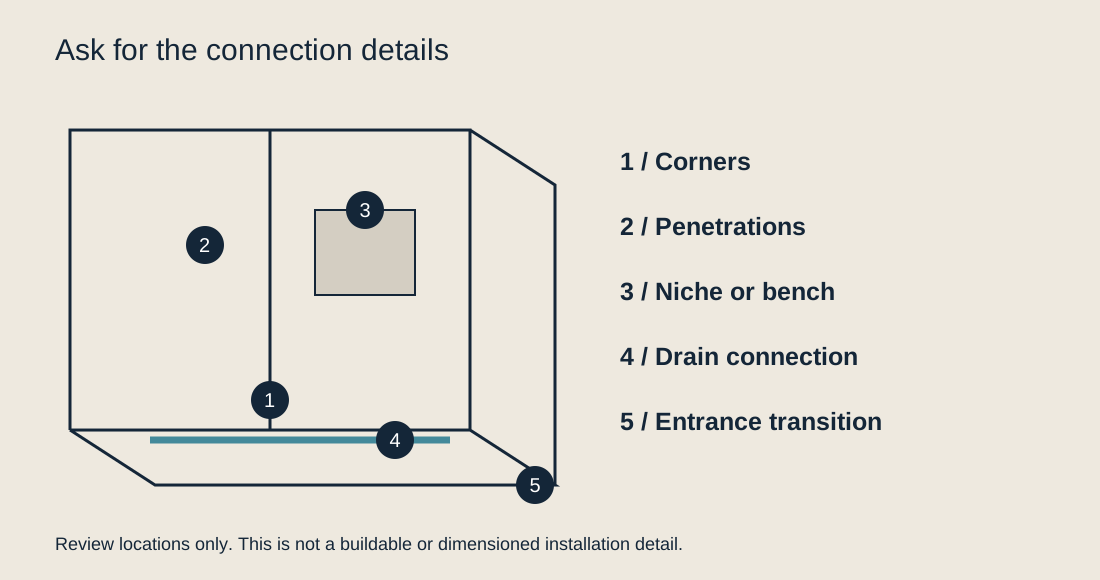
Bring the proposed drawings to a discussion about these locations:
- Wall-to-floor and inside corners: Which detail carries the selected waterproofing through the change in direction?
- Pipe penetrations and fixings: What seals each opening, including fixings added by later trades?
- Niches or benches: Which details cover the extra corners and exposed horizontal surfaces?
- Drain connection: How does the waterproofing interface with the selected drain body, beneath the visible grate?
- Shower entrance and adjoining floor: How are water movement and the transition to the rest of the room addressed?
Schlüter’s walk-in-shower guidance highlights construction height, drainage and waterproofing at transitions. It is European guidance, so its local standards and dimensions are not automatically U.S. requirements. Here it supports the planning questions, rather than a local code claim. [S07]
4. Choose finishes for the exact location
“Suitable for a bathroom” is too broad a description. A wall, a general bathroom floor and a shower floor have different uses. Daltile’s selection guide explicitly distinguishes floor, wall and shower-floor suitability. [S08]
| Finish option | A useful reason to consider it | Evidence to request |
|---|---|---|
| Porcelain or ceramic tile | Choice of appearance, format and finish | The exact product’s approved use, especially shower-floor suitability; cleaning instructions and installation requirements. |
| Large-format tile or slab | A design preference for larger uninterrupted surfaces | A layout showing cuts, drain position, corners and how the selected format works with the proposed floor geometry. |
| Mosaic or smaller tile | A design option for a smaller-scale pattern | The exact product’s use classification and a proposed layout, including joints and transitions. |
| Natural stone | A preference for a particular natural material | Stone identification, finish, compatible cleaning products and whether the supplier recommends an impregnating treatment. [S10] |
The last column is the basis for comparison; the material name alone is not an approval. Keep a written selection record that identifies the product, finish, size and intended location.
A slip-resistance number is not a guarantee
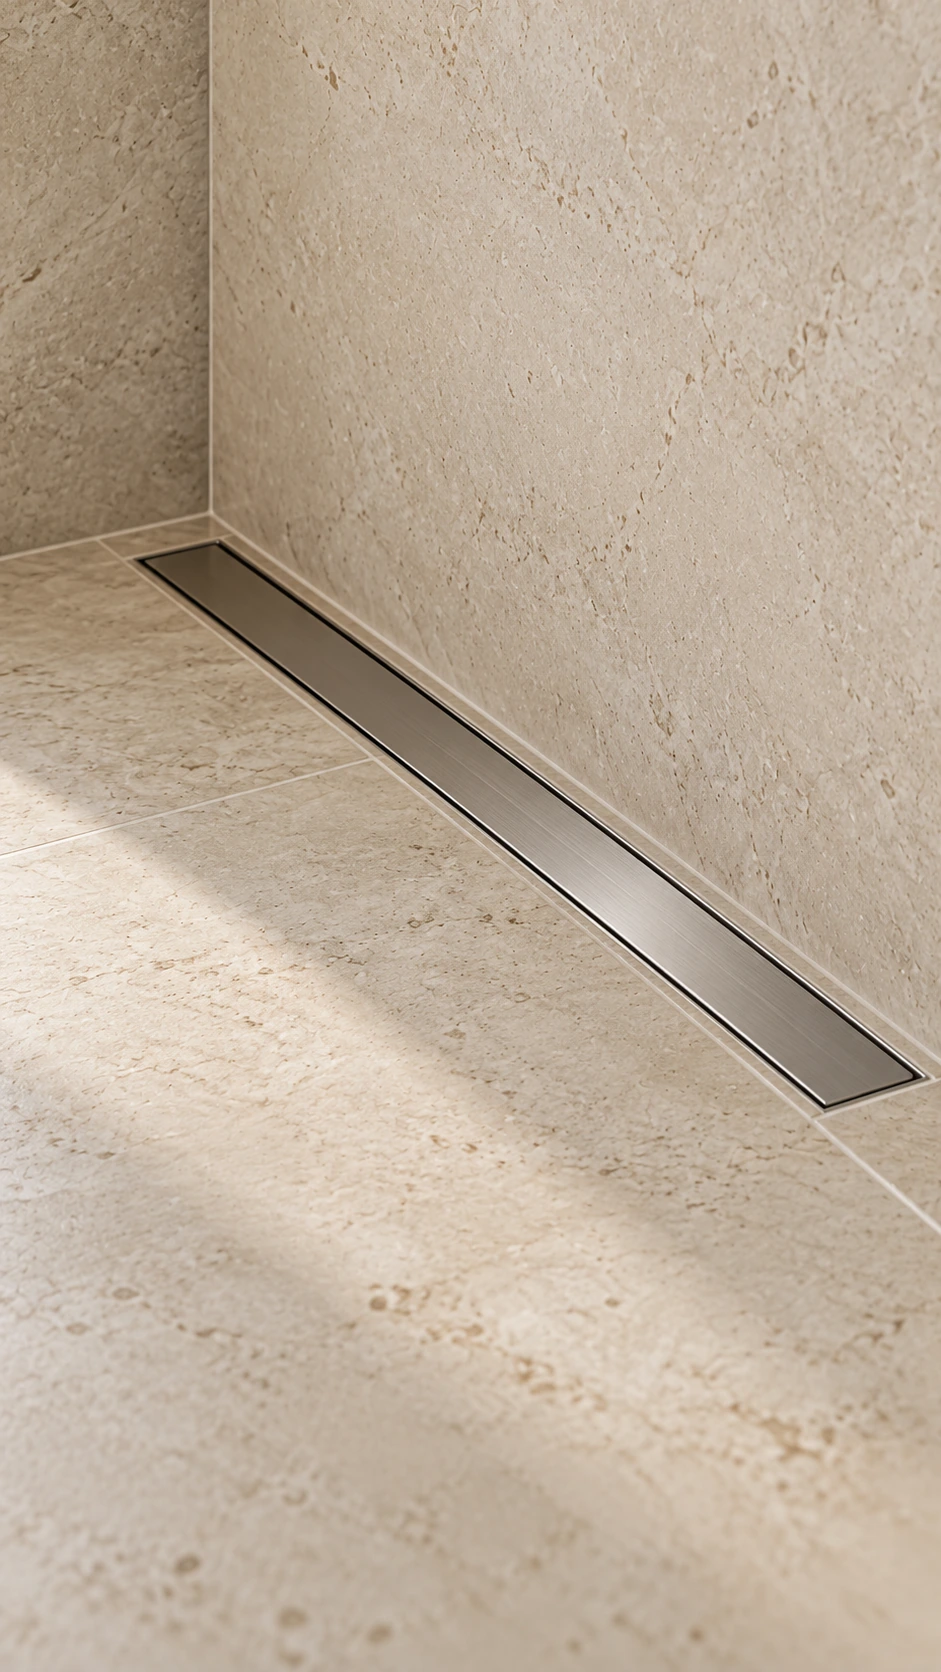
Daltile explains that DCOF is measured under controlled conditions and cannot determine whether a slip will occur in every real setting. It also states that no floor tile is slip proof. [S09] Ask about the manufacturer’s intended-use classification, drainage, cleaning and actual use conditions. A photograph of a polished shower floor is not evidence that the surface is appropriate for your project.
5. Use a sequence with review points
The following is a DLG coordination framework for agreeing responsibilities. It is not an installation manual or a substitute for the selected assembly instructions.
| Stage | Agree or record | Review before moving on |
|---|---|---|
| Existing-condition survey | Layout, visible moisture concerns, access and concealed-condition allowances | What still needs investigation? |
| Coordinated design | Fixtures, drain, floor build-up, thresholds, storage and ventilation | Do the drawings and quote describe the same scope? |
| Preparation and rough work | Substrate and plumbing work under the relevant specifications | Who checks readiness before waterproofing? |
| Waterproofing | Products, connection details and photographs before covering | Which inspections or tests apply, and who records them? |
| Tiling and completion | Finish layout, junctions and later fixings | Has the proposed system been protected during later work? |
| Handover | Product records, test records, care instructions and access points | Does the owner know how to maintain and report problems? |
For its shower kit, Schluter recommends a water test before tile installation and notes that an authority may require it on some projects. [S06] Agree the applicable test method, timing, responsibility and record for the actual project.
Record two separate times. The manufacturer’s water-test FAQ gives a minimum 24-hour wait after KERDI installation under normal curing conditions, with longer waiting in colder conditions. It separately describes holding a marked water level for a specified test period, typically 24 hours. [S15] “Typical” is not a universal local requirement. Ask the installer to record installation completion, test start and finish, the observations and the applicable local inspection requirements before tile covers the assembly. A visually tidy membrane or a finished photograph is not a test result.
6. Ventilation belongs in the renovation brief
Water on surfaces and moisture in the air need attention. EPA recommends controlling moisture and identifies bathroom exhaust to the outdoors as part of that approach. [S11, S12]
Ask the contractor to identify the existing exhaust route, the proposed equipment and the controls. Record who will confirm the installation and its applicable requirements. This guide does not specify a fan capacity or a fixed run time: those require the actual room, equipment and local requirements.
Practical question: If the room remains damp after normal use, what will be checked beyond the appearance of the tile?
03 / Care, quotation & handoverMaintenance, scope comparisons, installer questions and the worksheet.
7. Make care part of the material choice
Read cleaning instructions before buying the finish. The Natural Stone Institute recommends neutral cleaners for stone and explains that acidic products can damage calcium-carbonate-based stone. It also distinguishes stain resistance from a guarantee against staining. [S10]
For the handover folder, request the finish and grout care instructions, drain-cleaning guidance, fan-maintenance guidance and the names of products used at serviceable joints. Ask which changes should trigger a call to the installer. Use the actual manufacturers’ advice to set maintenance intervals rather than assigning one generic schedule to every material.
EPA’s moisture guidance supports repairing leaks and addressing excess moisture rather than relying on repeated cosmetic cleaning alone. [S11, S12] A recurring symptom is a reason to investigate its cause; it does not identify the cause by itself.
8. Common assumptions to challenge
| Assumption | A better question |
|---|---|
| “The tile makes it waterproof.” | Where is the water-control layer, and how are its connections completed? |
| “Waterproof board means the room is finished.” | Which joints, fixings, drain and transitions remain to be resolved? |
| “All tiles in the range are suitable for the floor.” | What is the use classification for this exact product, finish and size? |
| “The cheapest quote includes the same work.” | Are preparation, concealed conditions, waterproofing, tests and disposal included in each scope? |
| “A good final photograph proves the work underneath.” | What drawings, installation records and test results are available? |
Compare your two offers in the scope worksheet →
Compare two scopes before comparing the price
| Fictional offer | What it states | Missing or useful evidence |
|---|---|---|
| A: “waterproof and retile shower” | Finish and general waterproofing promise | Product, prep, corners, drain, test, exclusions and concealed-condition process remain unclear |
| B: named system and measured scope | Surface boundaries, compatible components, connection drawings, test responsibility and handover listed | More comparable scope; verify the documents, workmanship references and applicable credentials |
B’s wording is not proof of a good firm, and A may supply the missing information when asked. Request the same evidence from both. “What will you document before the tile goes on?” is more useful than relying on a photograph of another finished bathroom.
At handover, keep the product list, approved changes, pre-cover photographs, applicable inspection/test record, drain access and cleaning instructions together. Record unresolved items rather than allowing a neat surface to stand for completion of every trade.
9. Questions to take to your installer
- Which exact waterproofing assembly and current instructions form the proposal?
- How are the corner, penetration, niche, drain and entrance details documented?
- Which finish products are approved for each specific location?
- What inspection or testing is required before concealment?
- Who coordinates later fixings and protects completed waterproofing?
- How will variations and concealed defects be agreed?
- What ventilation work is included, and where does the exhaust terminate?
- Which records, spare materials and care instructions will be handed over?
Take the guide into a proposal review
Use the Kitchen, Bathroom & Floors proposal worksheet to record three firms’ answers to the same scope questions, identify evidence needed before covering work, and keep unresolved items with their responsible person. Notes can be downloaded and the selected area printed. The worksheet is a planning record, not a firm rating or a design approval.
Sources, assumptions and review dates
Sources and how to use them
Original sources checked 19 October 2026; S13–S14 reviewed 20 October 2026. Manufacturer pages explain their own products; they are not independent brand rankings. EPA supplies public moisture and ventilation guidance. The Natural Stone Institute is an industry technical source. Product names illustrate distinctions and do not establish a DLG supplier recommendation. Local requirements and the selected product’s current instructions govern a real installation.
S01 — Schluter: Waterproof Shower. Finish versus waterproofing.
S02 — James Hardie: Hardie Backer Board. Standard product description.
S03 — James Hardie: Hardie Backer PRO. Integrated waterproof-board example and required joint treatment; current availability is regional and is not a general procurement claim.
S04 — LATICRETE: HYDRO BAN Sheet Membrane. Sheet-membrane system example.
S05 — LATICRETE: HYDRO BAN. Liquid-membrane system example and condition-dependent installation information.
S06 — Schluter: KERDI-SHOWER-KIT instructions. Testing before tile.
S07 — Schlüter, European guidance: Walk-in showers. Build-up, drainage and transition planning; European code references are not applied as U.S. rules here.
S08 — Daltile: Factors to consider when selecting tile. Distinct intended-use categories.
S09 — Daltile: DCOF and slip-resistance results. Test interpretation and limitations.
S10 — Natural Stone Institute: Care and cleaning. Stone identification, cleaners and impregnating treatments.
S11 — US EPA: Ten things to know about mold. Moisture control and outdoor exhaust.
S12 — US EPA: Care for your air. Ventilation and moisture management.
S13 — Schluter: Shower System Installation Handbook, accessed 20 October 2026; printed page 22 for KERDI wall seams and handbook water-test guidance. Narrow selected-system example; complete design and current local requirements remain separate.
S15 — Schluter: Water-test method and timing. U.S. FAQ text reviewed 29 October 2026 through web retrieval; direct automated access returned 403. Source for the distinction between curing wait and test duration; not an installation approval.
S14 — MTA Capital Construction Mega Projects: LIRR bathroom wall installation, 11 October 2018, CC BY 2.0.
